
When it comes to epoxy floor coating, surface preparation plays a pivotal role in the outcome. Without proper preparation, even the highest quality epoxy can fail to adhere and last as expected.
This process is far more than a simple cleaning routine. It involves a careful and deliberate series of steps to create an ideal surface for the coating. Getting the preparation right, you set the foundation for a floor that can withstand wear, spills, and heavy traffic.
Evaluate the Concrete Condition
Before looking into any prep work, it is vital to assess the condition of the concrete surface. Inspecting for cracks, holes, and structural weaknesses makes sure that you know exactly what you’re dealing with.
A concrete surface that is too damaged or uneven may require further attention, such as patching or resurfacing. For any areas that show signs of wear or deterioration, addressing these issues first is necessary to maintain the integrity of the final coating.
If the surface contains any moisture or water vapor trapped inside, it is critical to address that too. Excess moisture in the concrete can prevent the epoxy from adhering properly and lead to peeling or bubbling over time.
Some moisture tests, such as the plastic sheet test, can give you a clear indication if this is an issue.
Clean the Surface Thoroughly
Cleaning is one of the most important steps in epoxy floor coating surface preparation. Any dirt, dust, grease, oil, or other contaminants can prevent the epoxy from bonding with the surface.
Begin by sweeping or vacuuming the surface to remove loose debris. Afterward, wash the surface with a suitable degreaser or detergent to remove any oils or residues. Use a power washer for large surfaces to make sure of a deep clean.
Let the surface dry thoroughly after cleaning. Any moisture left behind can interfere with the adhesion of the epoxy. Waiting for a completely dry surface is necessary for a strong bond between the floor and the coating.
Remove Any Existing Floor Coatings
If the concrete floor has a previous coating, such as old paint or varnish, it must be removed before applying epoxy. This step is often overlooked, but it is just as important. Old coatings can prevent the new epoxy from properly bonding, leading to peeling or failure.
You can remove existing coatings through sanding, grinding, or chemical stripping. Sanding or grinding is often the best approach, as it makes sure to deliver a clean and smooth surface. Depending on the type of old coating, you may need to use a combination of methods.
Patch and Repair Cracks and Holes
Any cracks or holes in the concrete surface should be filled and repaired before applying epoxy. Cracks in the concrete can grow under the pressure of foot traffic or machinery. This will cause the coating to crack or peel. Use concrete patching products that are designed to bond with the concrete for long-lasting results.
It is important to apply the patching compound smoothly and level with the surrounding surface. Once the patched areas have cured, use a floor grinder to make sure that the surface is even.
Test the Concrete for Moisture
Before proceeding with the application of epoxy, test the concrete for moisture. Moisture trapped in the concrete can cause adhesion problems with epoxy coatings.
A simple method for testing moisture is the plastic sheet test. This is where you tape a plastic sheet to the floor and check for condensation after 24 hours.
If moisture is detected, you may need to install a vapor barrier or allow the concrete to dry out further. It is always better to address moisture issues now than deal with coating failures later.
Grind the Surface for Better Adhesion
One of the most effective ways to prepare the concrete for epoxy is to use a diamond grinder. Grinding the surface creates micro-abrasions that allow the epoxy to bond more effectively. Grinding also helps remove any rough patches and smooths out the surface, guaranteeing a uniform finish.
While grinding, it is important to choose the right diamond tool based on the hardness of the concrete. Using the wrong tool can damage the floor, leave it too smooth, and reduce the effectiveness of the coating.
Level the Surface for Smoothness
Uneven or sloped floors can make it difficult for the epoxy coating to spread evenly. Before applying the coating, take the time to level the surface. This may involve the use of self-leveling compounds or additional grinding.
In some cases, a floor that is severely sloped may require significant work to correct. Be sure to address any unevenness before applying the epoxy to avoid future issues.
Remove Dust and Debris
After grinding the surface, dust and debris will inevitably remain. It is critical to remove these particles to avoid contaminating the surface. Use a vacuum or tack cloths to wipe away any remaining dust and debris.
Some people make the mistake of not thoroughly cleaning the surface after grinding, which can lead to adhesion problems. Taking the time to remove all dust and particles will guarantee a much better final result.
Apply a Bonding Agent (If Needed)
In certain situations, a bonding agent may be necessary to help the epoxy adhere better to the surface. This is typically required for surfaces that are particularly smooth or glossy. A bonding agent creates a stronger bond between the epoxy and the concrete, leading to better long-term results.
Be sure to follow the manufacturer’s instructions carefully when applying a bonding agent. Allow it to dry completely before applying the epoxy coating.
Allow the Concrete to Dry Completely
After cleaning and prepping the surface, let the concrete dry thoroughly before applying the epoxy. Any moisture left behind can cause issues with the adhesion of the epoxy. Depending on the humidity and temperature, this may take anywhere from 24 to 48 hours.
It is always better to be patient and allow the concrete to dry completely. Applying the epoxy too soon can result in a subpar finish.
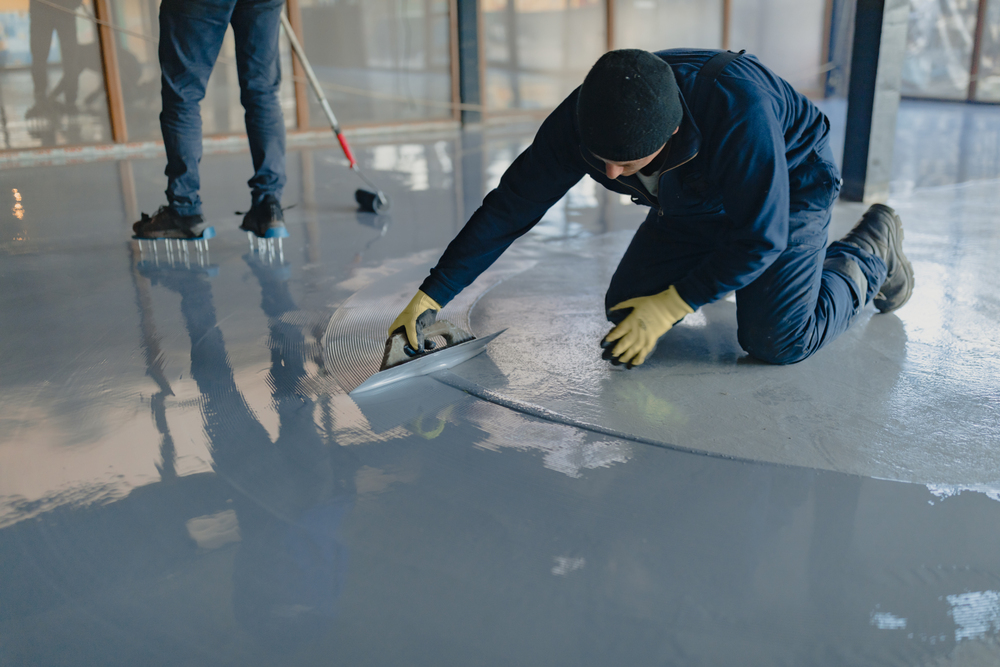
Apply the Epoxy Coating
After fully preparing the surface, you can begin applying the epoxy coating. Mix the epoxy thoroughly and follow the manufacturer’s guidelines. Use a roller or squeegee to spread the coating evenly, starting in one corner and gradually working your way across the entire area.
Be sure to apply the epoxy in thin, even layers. This will allow each layer to cure before applying the next and guarantees a durable, smooth finish.
Let the Epoxy Cure Properly
After applying the epoxy, it is important to allow it to cure fully before using the floor. Curing times can vary based on the type of epoxy and the environmental conditions. Typically, it takes 24 to 48 hours for the epoxy to set, but it may take several days to fully cure.
Avoid walking on or using the floor until it has fully cured. Rushing the curing process can compromise the strength of the epoxy coating.
Contact Elite Flooring Solutions, LLC for Professional Epoxy Floor Coating Surface Preparation
Here at Elite Flooring Solutions, LLC, we specialize in epoxy floor coating surface preparation. Our team of experts makes sure that every step, from cleaning and grinding to leveling and applying the epoxy, is done to perfection.
We take pride in offering the highest quality services for both residential concrete coatings and commercial projects. Let us help you achieve a flawless finish that will last for years to come.
Ready to transform your floors? Contact us today for a free consultation and experience the difference with Elite Flooring Solutions, LLC.